---
title: "Phoenix Line Control: Operator Guide"
description: Operator guide
---
[Skip to content](https://support.oalgroup.com/phoenix/phoenix-line-control-operator-guide#main-content)
English - United Kingdom
Show submenu for translations

- [Tickets](https://support.oalgroup.com/tickets-view)
- [OAL Website](https://www.oalgroup.com/)
- [Sign out](https://support.oalgroup.com/_hcms/mem/logout)
Open main navigation
Close main navigation
- [Tickets](https://support.oalgroup.com/tickets-view)
- [OAL Website](https://www.oalgroup.com/)
- [Sign out](https://support.oalgroup.com/_hcms/mem/logout)
- English - United Kingdom
Show submenu for translations
- Contact us
Contact us
How can we help you?
- There are no suggestions because the search field is empty.
1. [Phoenix](https://support.oalgroup.com/phoenix?hsLang=en-gb)
2. [Getting started](https://support.oalgroup.com/phoenix/getting-started?hsLang=en-gb)
11 July 2025
# Phoenix Line Control: Operator Guide
## Step-by-step instructions to log in, load jobs, run setup checks and manage devices on the line
### 🔐 1. Logging in and out
Before starting any operation, you must log in.
### To log in:
1. Tap **“No User”** in the top corner
2. Select **“Log In”**
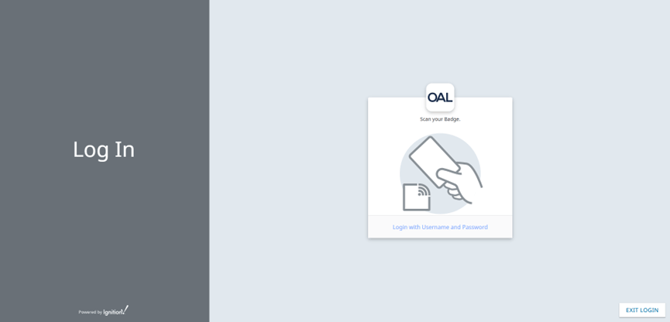
3. **Scan your RFID card** or enter your **username manually**
4. Enter your **password** and tap **Continue**
> If login fails, try again or see your supervisor. If the user is not registered, refer to your site admin.
---
### To log out:
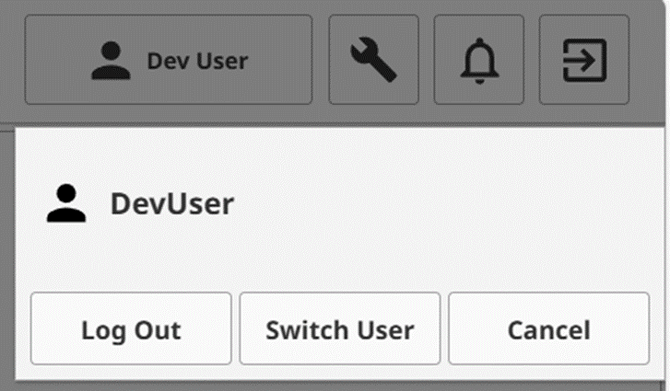
1. Tap the **user icon** in the corner
2. Select **“Log Out”**
3. You will return to the splash screen
---
#### 🏠 2. Overview screen
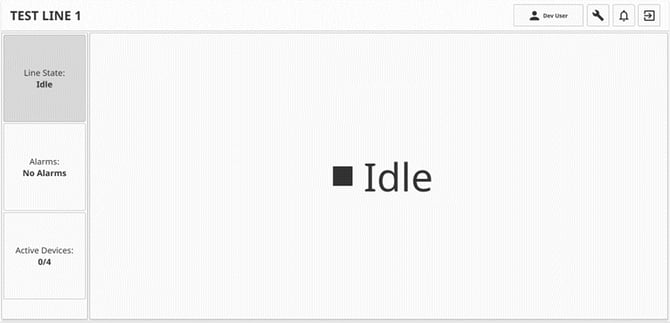
After login, the system displays the **Overview screen**.
This shows your site's current status:
| Icon | Meaning |
| --- | --- |
| 🔴 Red document | **New alarm** – unacknowledged |
| 🟤 Brown document | **Acknowledged alarm** |
| ⚪ Grey document | No alarms present |
> All alarms must be cleared before starting production.
> See [Alarms](https://support.oalgroup.com/phoenix/phoenix-line-control-operator-guide#4-alarms) for how to acknowledge them.
---
#### ▶️ 3. Loading and running a job
### 3.1 Start a job
1. Tap the main screen and select **Start Job**
**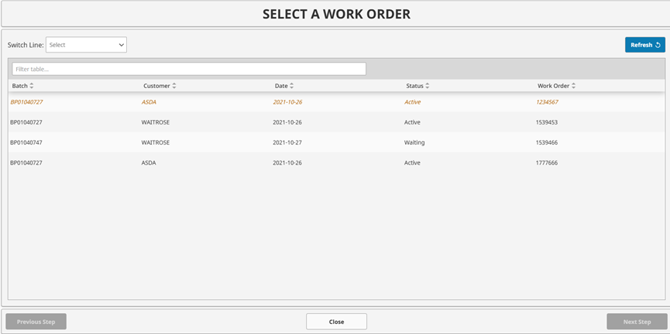**
1. On the **Work Order screen**, you can:
- Use **Switch Line** to change production line
- Use **Filter** to find your job
- Click a column to sort alphabetically
- Click **Refresh** if the job doesn’t appear
- Use **Previous** and **Next** to scroll between pages
⚠️ Jobs that are **in red** are missing required information and cannot be started.
Once the correct Work Order is selected, tap **Next Step**
---
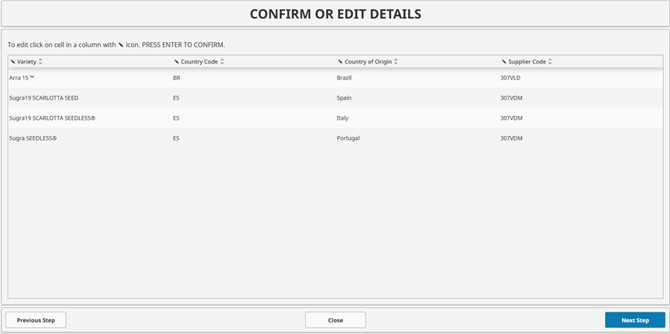
### 3.2 Confirm or edit job details
On this screen:
- You’ll see a list of **product variants** or options
- Tap the edit icon (✏️) in any cell to adjust data
- Press **Enter** to confirm – if not, you’ll see a reminder
- Check all data carefully before continuing
---
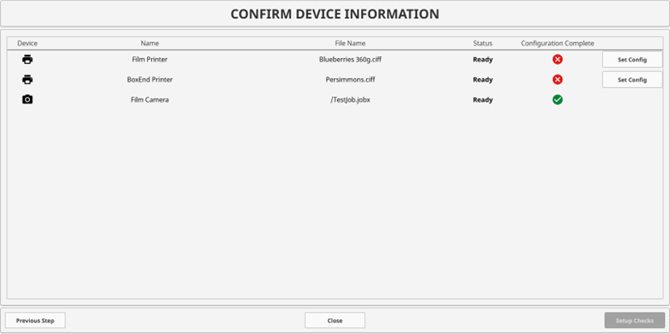
### 3.3 Confirm device information
This screen confirms which equipment is used and what each device is doing (e.g. print file or scanner job).
- Devices with a red ❌ need configuration
- Tap **Set Config** and enter the missing info
- Box-end printers have a field for number of labels (set to 0 for continuous print)

- Once complete, tap **Confirm**
- If cameras are enabled, you'll go to **Setup Checks**
- If not, you’ll go straight to **Start Job**
****
---
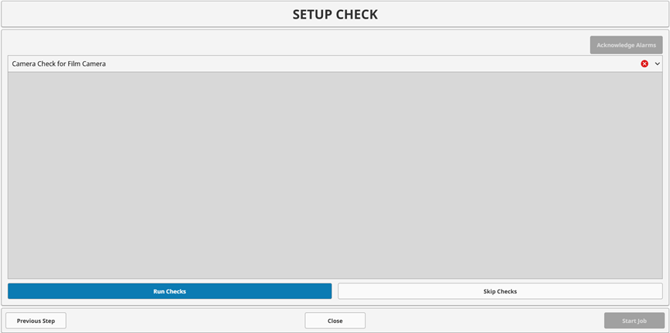
### 3.4 Setup checks (if camera in use)
Here you’ll see a checklist:
- Tap ✅ to run the check
- Tap ❌ to skip it (if permitted)
- Tap the bell icon 🔔 to acknowledge any alarms
Camera checks will deliberately send incorrect data to test scanner detection (expect **No Reads**).
---
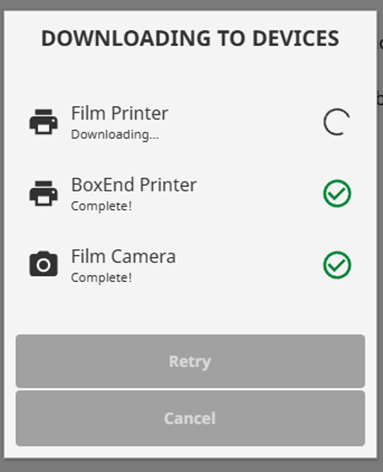
### 3.5 Information download and line running
Once setup is complete:
- The system downloads information to devices
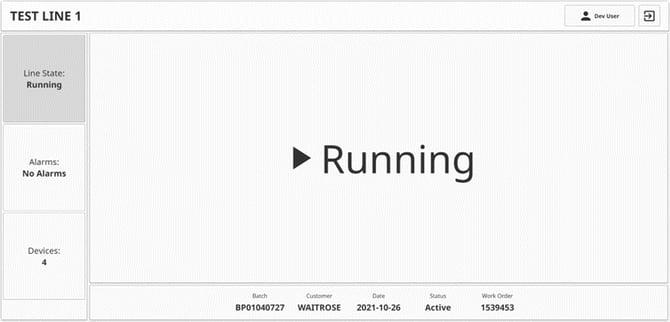
- The **line state** changes to **Running**
****
Your main job screen shows:
- Live job and works order info
- Device list with live statuses
- Alarms (if any)
- Tap the play icon ▶️ to:
- Take a break
- Stop the job
- Reopen device configuration via **Update Details**
---
#### 🚨 4. Alarms
Phoenix tracks and displays alarms using coloured indicators.
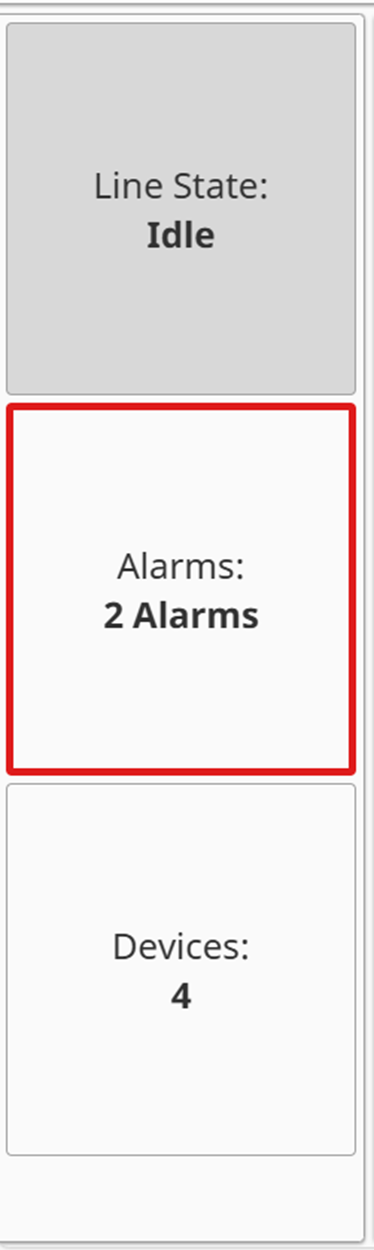
### 4.1 Alarm status colours
- 🔴 Red – New alarm
- 🟤 Brown – Acknowledged
- ⚪ Grey – No alarm
Tap the alarm icon to open the **Status tab**:
| Option | Description |
| --- | --- |
| 1. Alarm count | Number of active issues |
| 2. Filter bar | Search for a specific alarm |
| 3. Alarm detail | Tap to see more info |
| 4. Acknowledge all | Clears all current alarms |
#### 🖧 5. Device management
Tap the **Devices** tab to view connected equipment.
For each device:
- Tap to view **details** or apply a **concession**
- To apply a concession, tap **Concess Device** and confirm
- To remove it, tap the device again and select **Unconcess**
You must **acknowledge** any device status change before starting or resuming production.
#### 🔔 6. Notifications
Tap the notification icon to manage site/system messages:
| Button | Function |
| --- | --- |
| 1. Notification panel | Opens the list |
| 2. Show | Expands individual message |
| 3. Dismiss | Closes one message |
| 4. Dismiss All | Clears the list |
| 5. Close | Returns to main screen |
---
#### ✅ Summary
| Task | Where to do it |
| --- | --- |
| Log in/out | Top corner \> User icon |
| Start a job | Main screen \> Start Job |
| Edit job info | Job config \> Tap ✏️ |
| Configure devices | Confirm screen \> Set Config |
| Run setup checks | Shown only if camera is used |
| View alarms | Alarm icon \> Status tab |
| Manage devices | Devices tab |
| Handle messages | Notification icon |
- [Reports](https://support.oalgroup.com/phoenix/reports?hsLang=en-gb)
- [Getting started](https://support.oalgroup.com/phoenix/getting-started?hsLang=en-gb)
[](http://www.oalgroup.com)
[mailto:email@email.com](mailto:email@email.com)
Copyright © 2026, Olympus Automation Limited trading as OAL